

Your LoDi-S88-Commander LX can now show you more.
The new WebUI for the LoDi-S88-Commander LX: feedback at a glance, settings right at the channel and updates in the browser. We show you what that looks like on your layout.
- Your proven LoDi-S88-Commander LX
- Operated in your local network
- No cloud, no user account
You have connected a new track section. Now you want to see whether the right detector responds, give the channel a meaningful name and check its setting. This is exactly the kind of work our new web interface is built around. Your proven LoDi-S88-Commander LX stays – the way you operate it is new.
The WebUI is part of the LoDi-S88-Commander LX firmware. You open its local address in the browser and have the bus view, detector monitor and system settings in one place. You need no additional software installation, no user account and no cloud for this. The interface stays available even in a model railway network without internet.
From the cable to the right track section
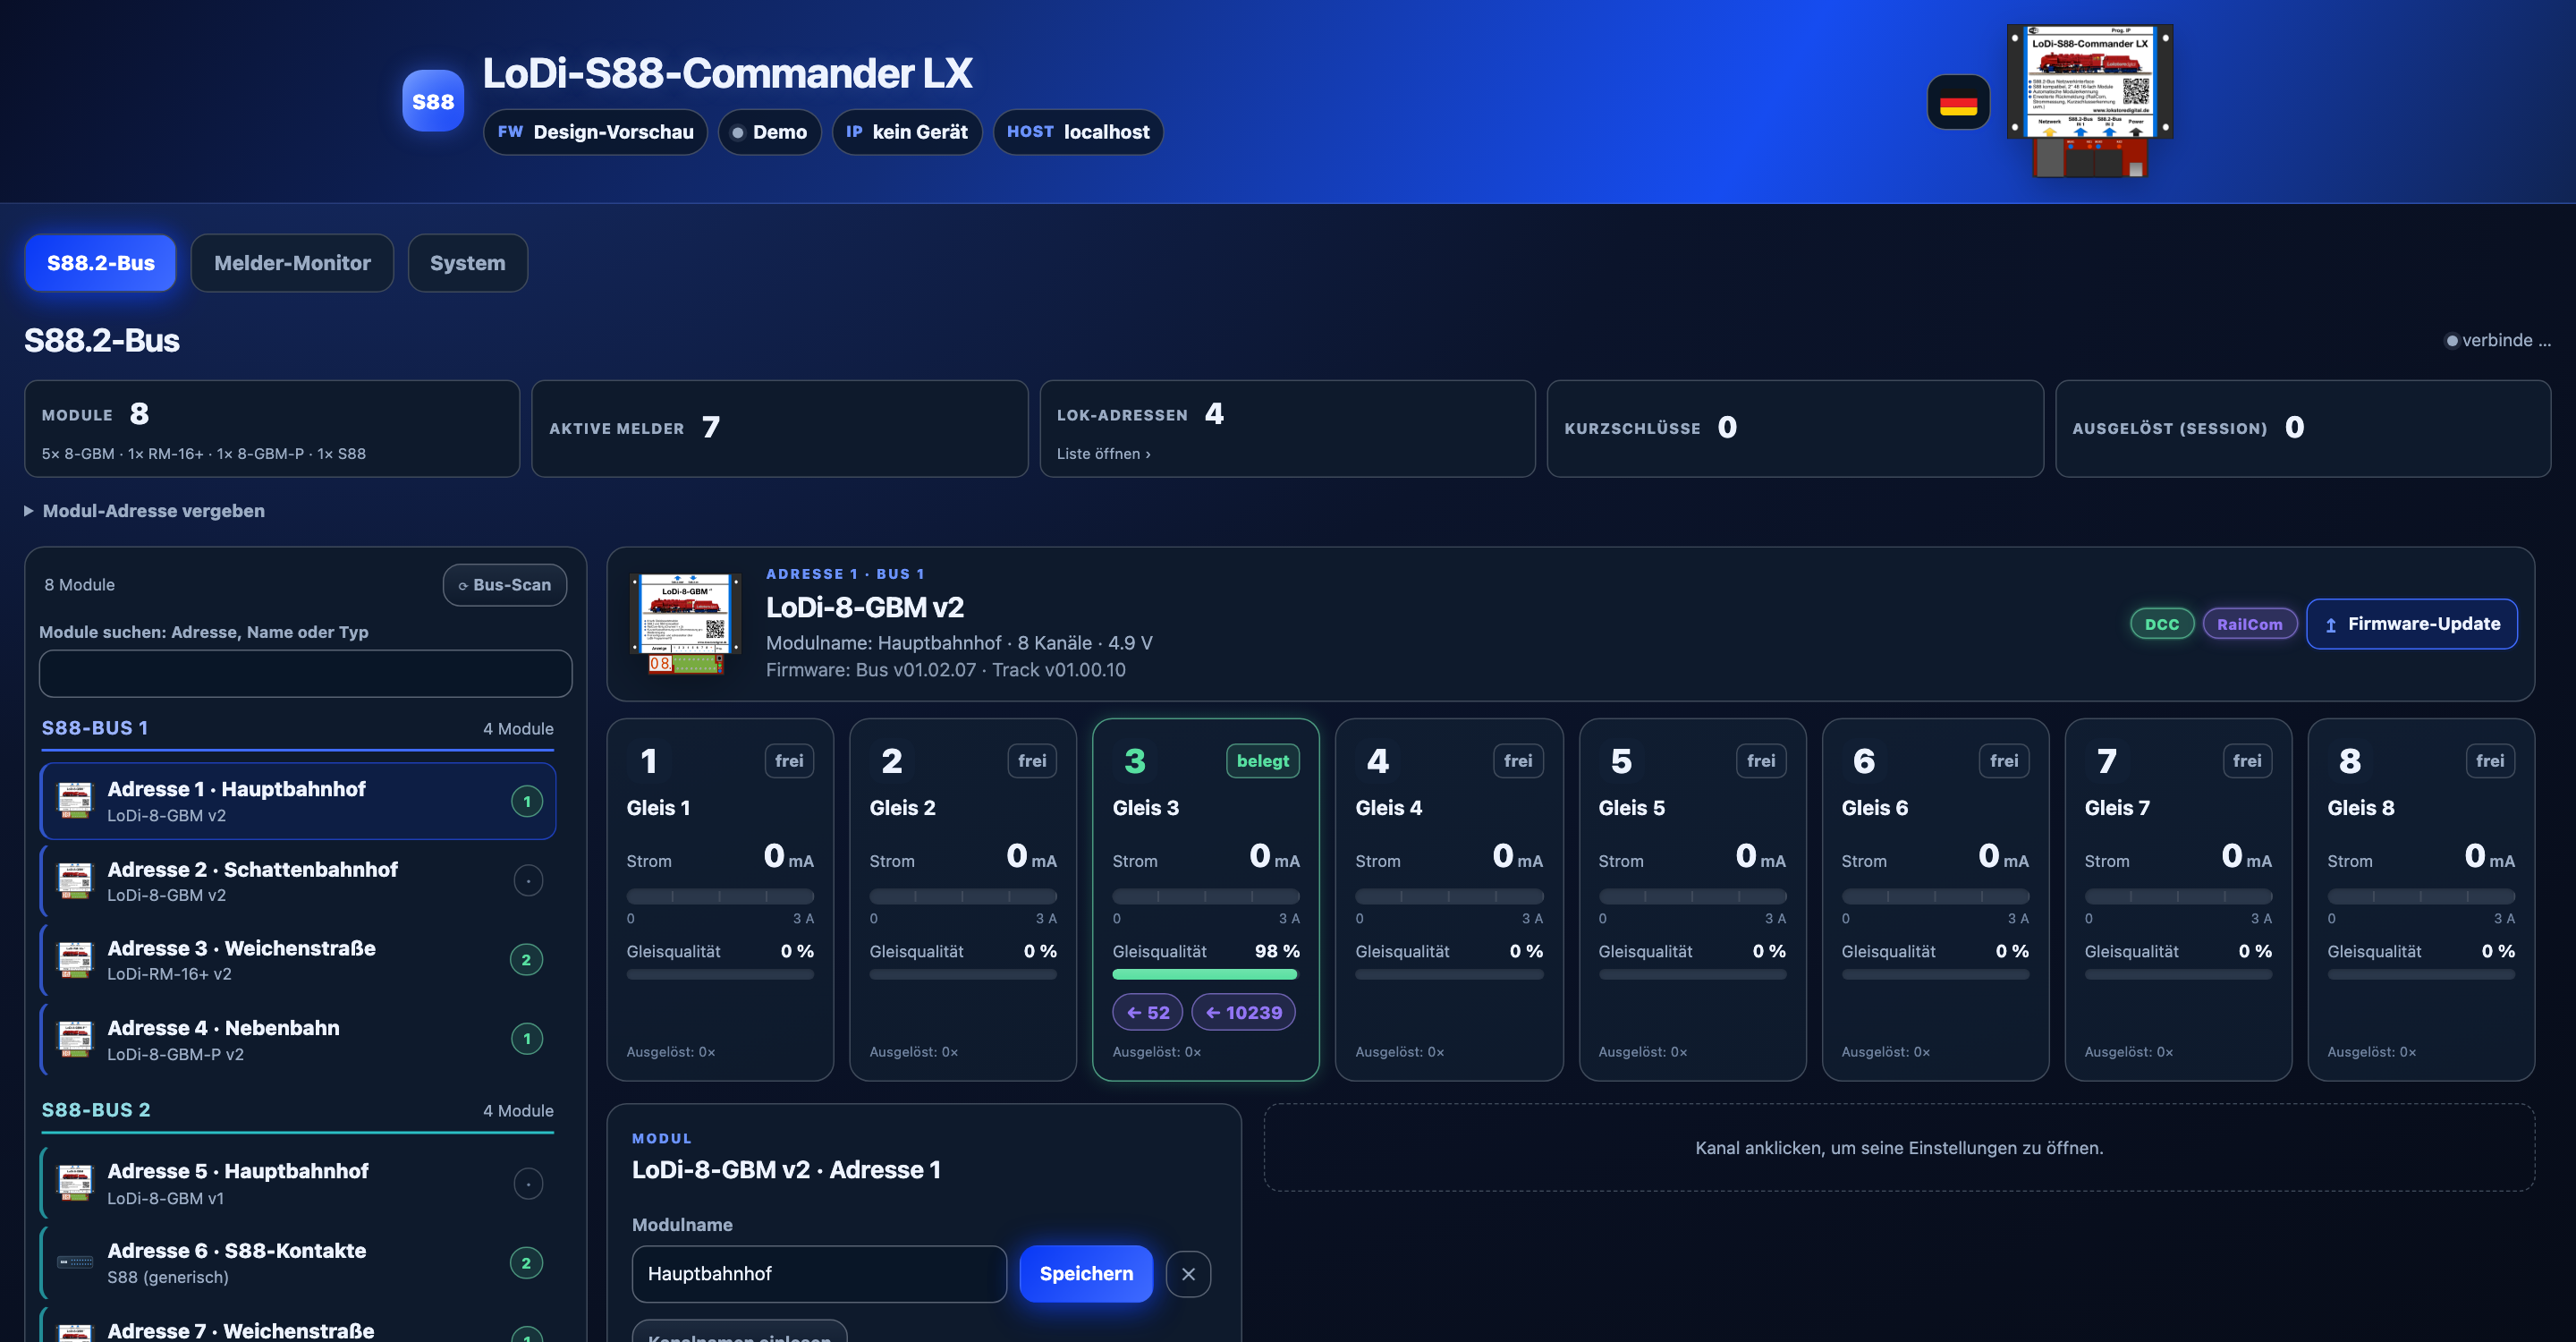
On a layout that has grown over the years, module address, mounting location and track name are not always obvious. That is why the bus view starts with a clear list: separated by bus chain and searchable by address, name or module type. On the right you see the channels of the selected module. Product image, module name and available status information help you match them up.
For example: checking the entry to the staging yard – Find the corresponding module, select it and create an occupied indication on the track in a controlled test. The channel view shows you which input responds. You can then name this channel directly, for instance "Staging entry". The next time you check, you see not just a number but a name from your layout.
On a large screen, the module list and the detail area scroll independently. The selection stays handy while you work on a module on the right. A bus scan clearly shows its progress, and you do not need to rescan again and again to keep the display up to date.
One layout, three useful perspectives
Setting up needs different information than looking across an entire staging yard. In the Detector monitor you therefore switch between three views. The detectors stay assigned to their modules and bus chains – only the amount of additional information changes.
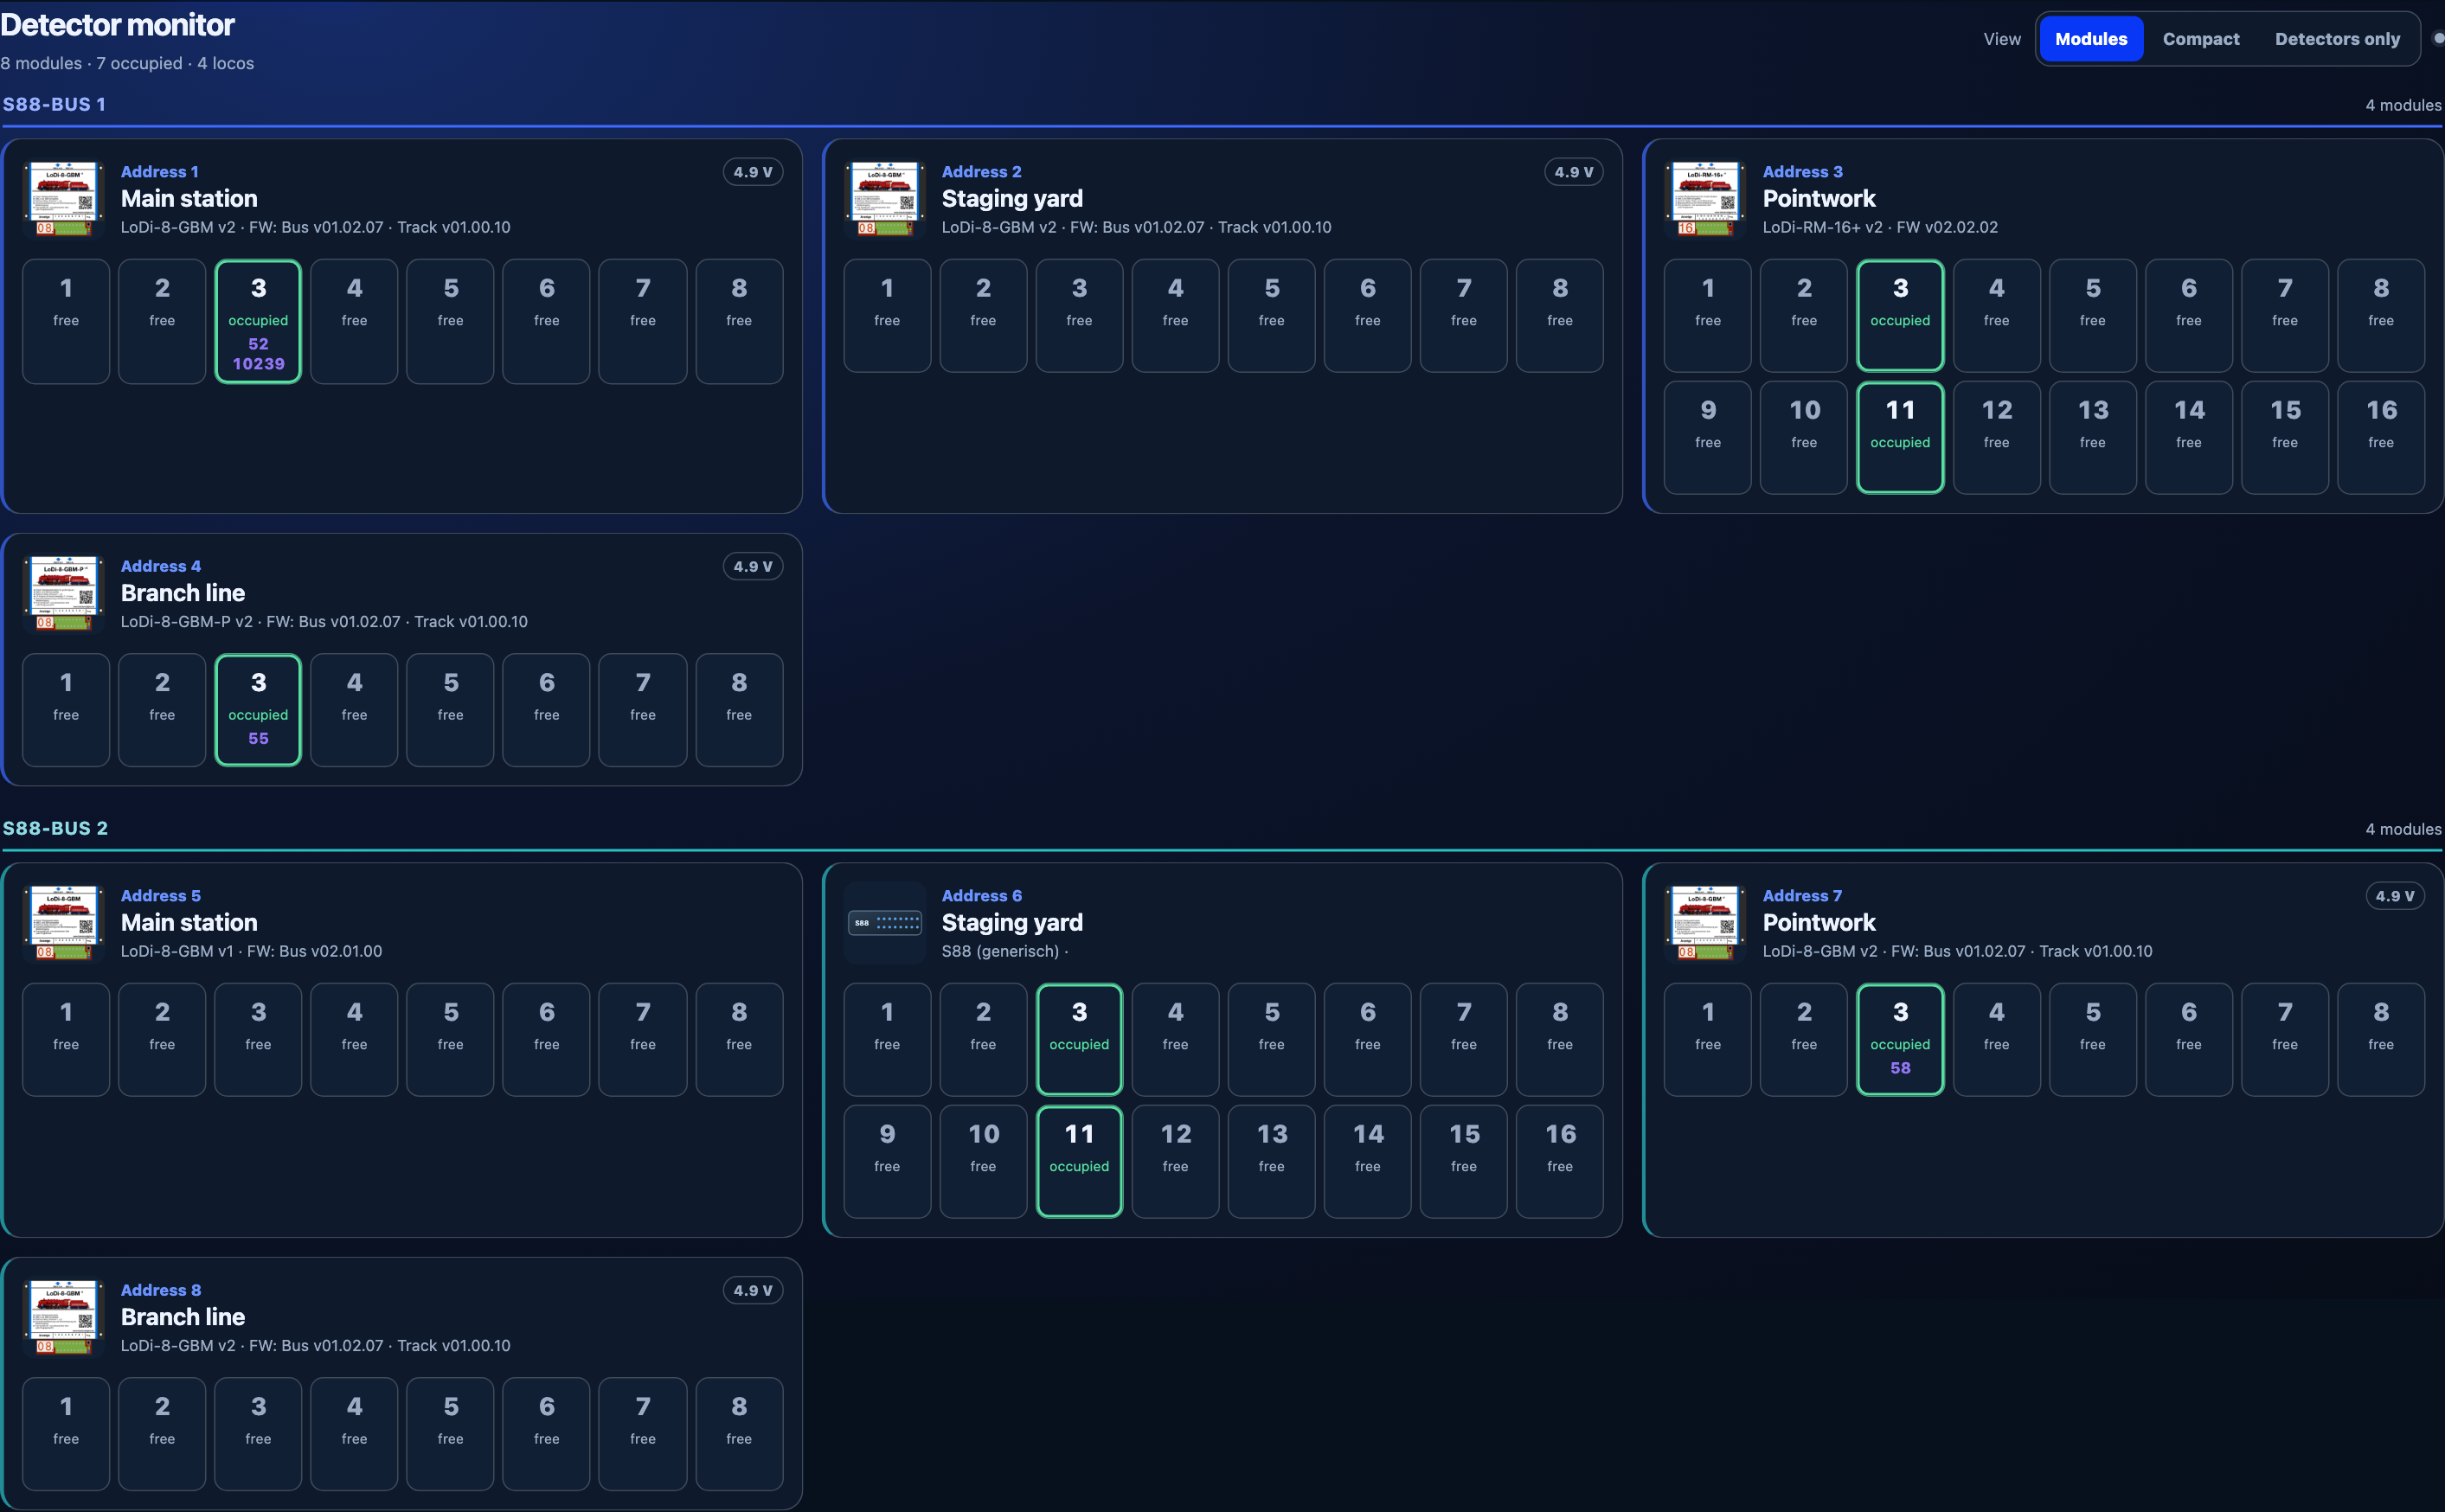
Modules: when you want to take a closer look
The detailed view shows the feedback modules with their channels and available additional information. It helps when you commission a new part of the layout or want to assign reports to a specific module. With suitable modules, detected RailCom locomotive addresses are shown as well.
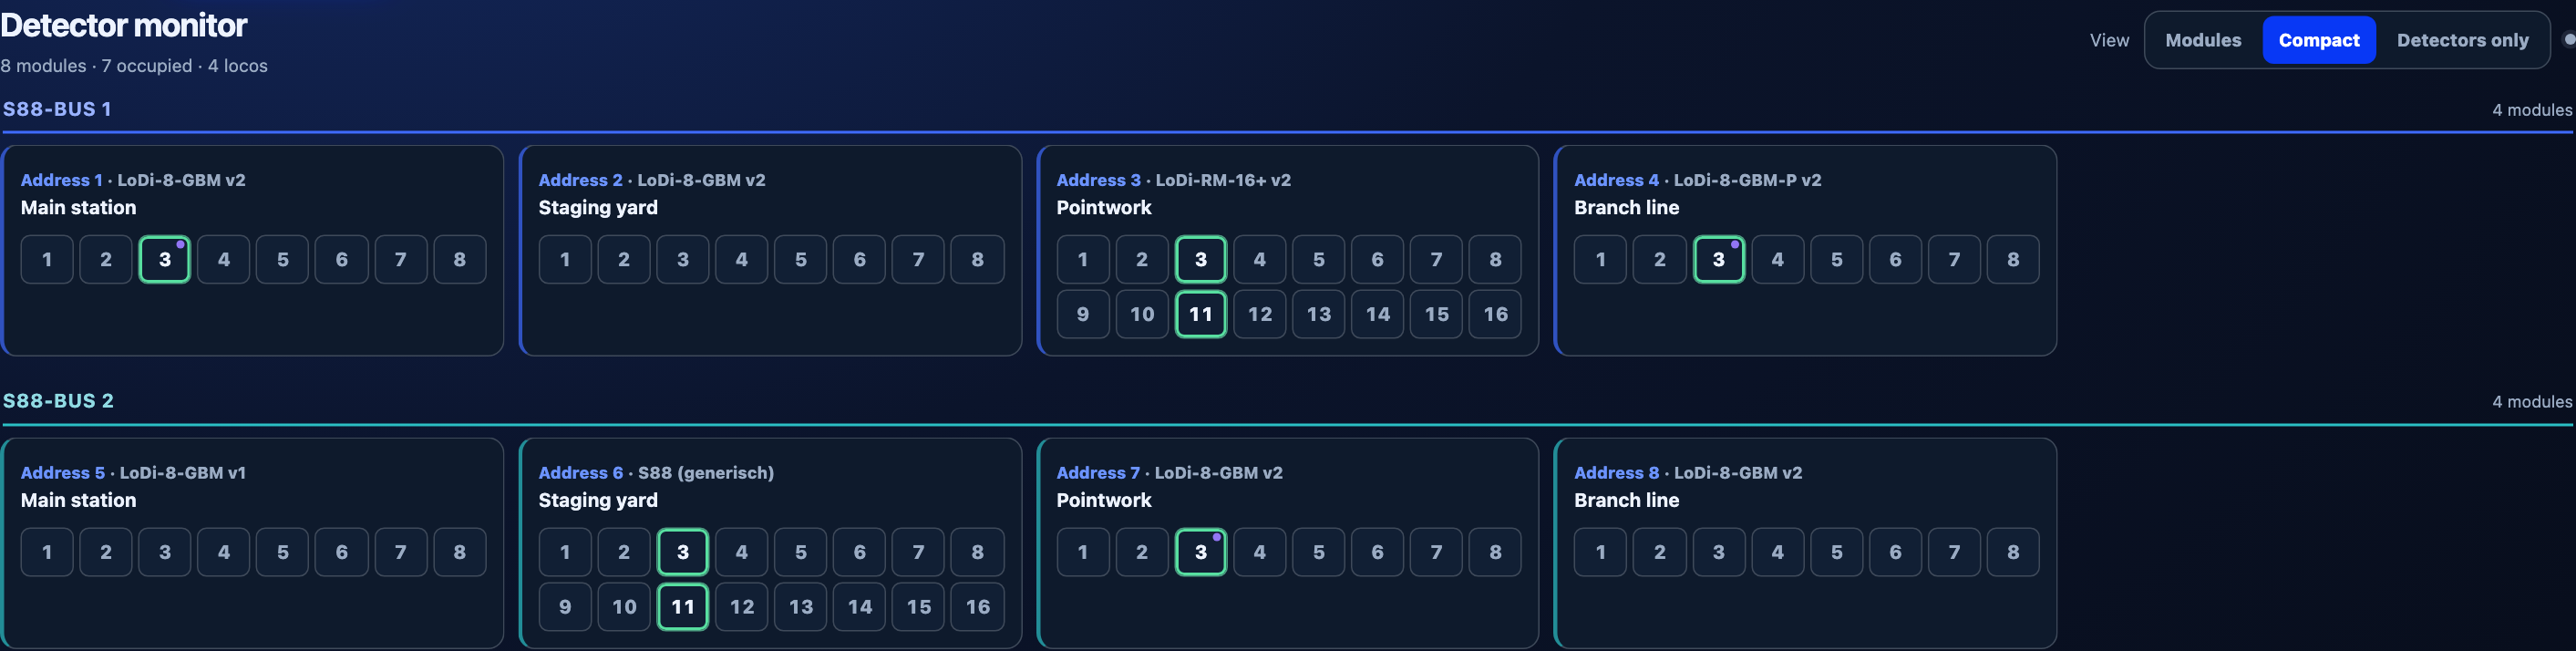
Compact: more detectors at a glance
Once the assignment is in place, the state of the detectors moves to the fore. Compact reduces the module details and makes room for more channels. During a test run you can follow how occupied and free indications move through the sections while keeping both bus chains in view.
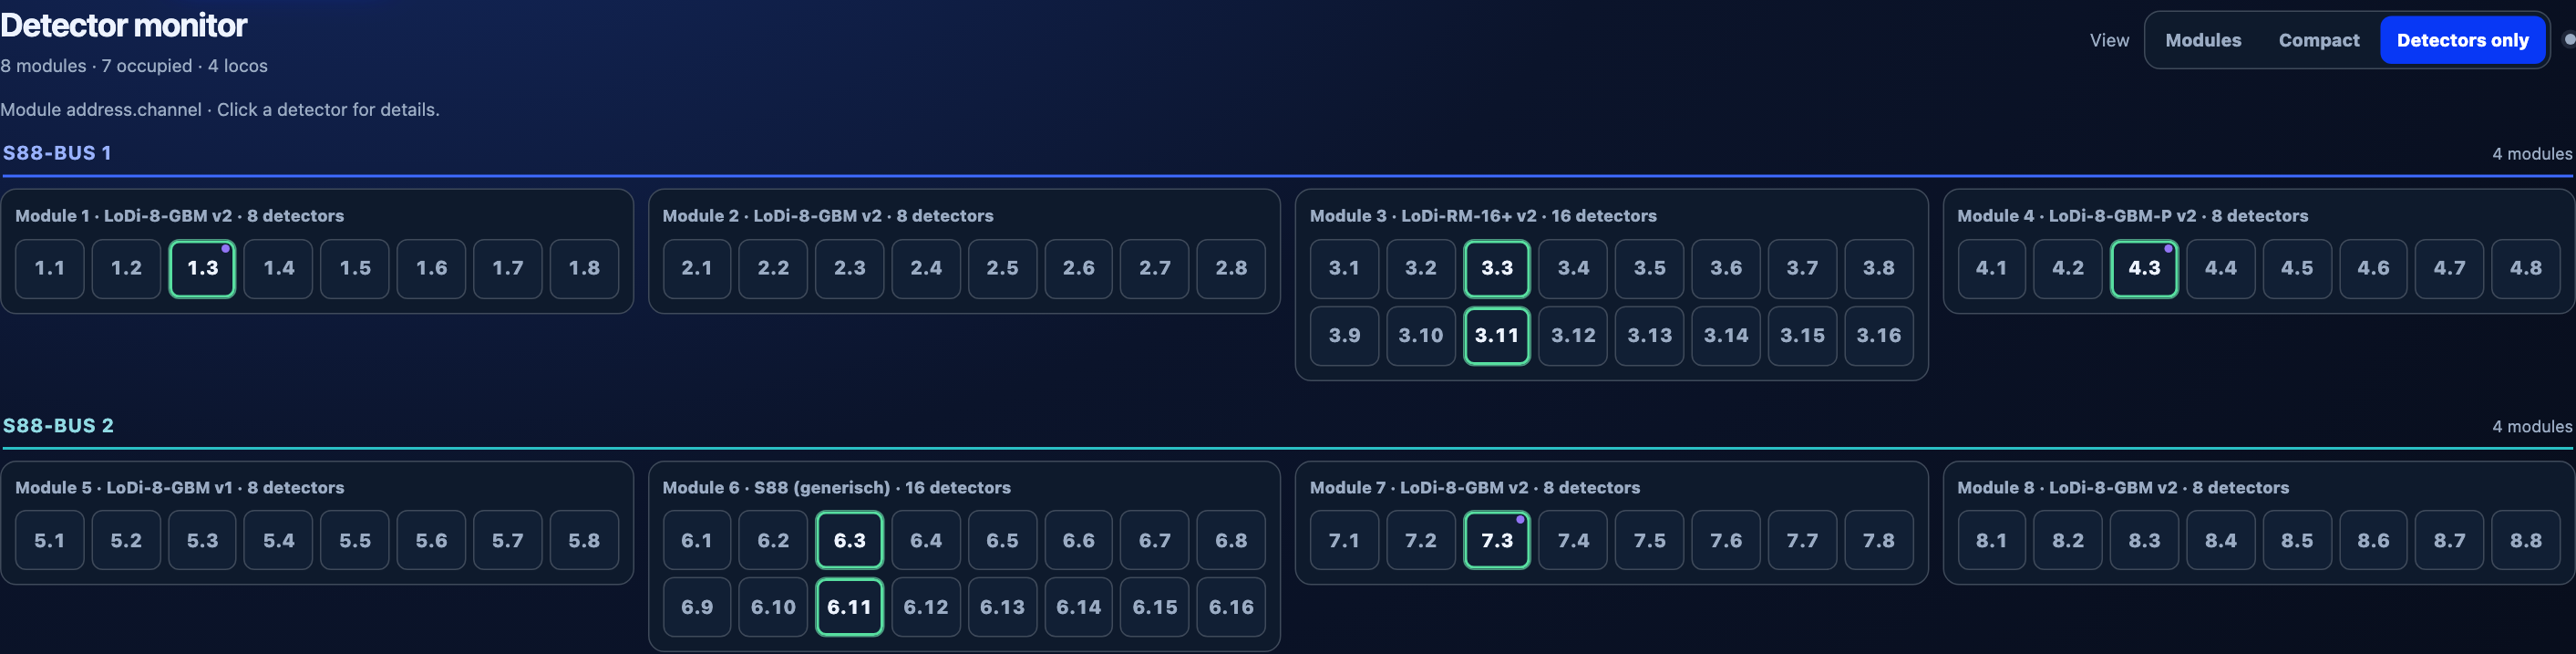
Detectors only: the big picture without clutter
For many detectors on one screen there is Detectors only. Clear frames keep the channels of a module together; labels such as 4.3 stand for module address 4, channel 3. Even in a densely packed view you can see where the next module begins. In the reduced views, a purple dot marks a detected RailCom address. Clicking a detector takes you to its details.
One click on the channel. The setting right there.
A particular input needs attention? Click its tile. On a large screen the settings open right next to the module view; on narrow screens as a dialog. The link to the selected module and channel is kept. You do not have to find the right input again in a second list.
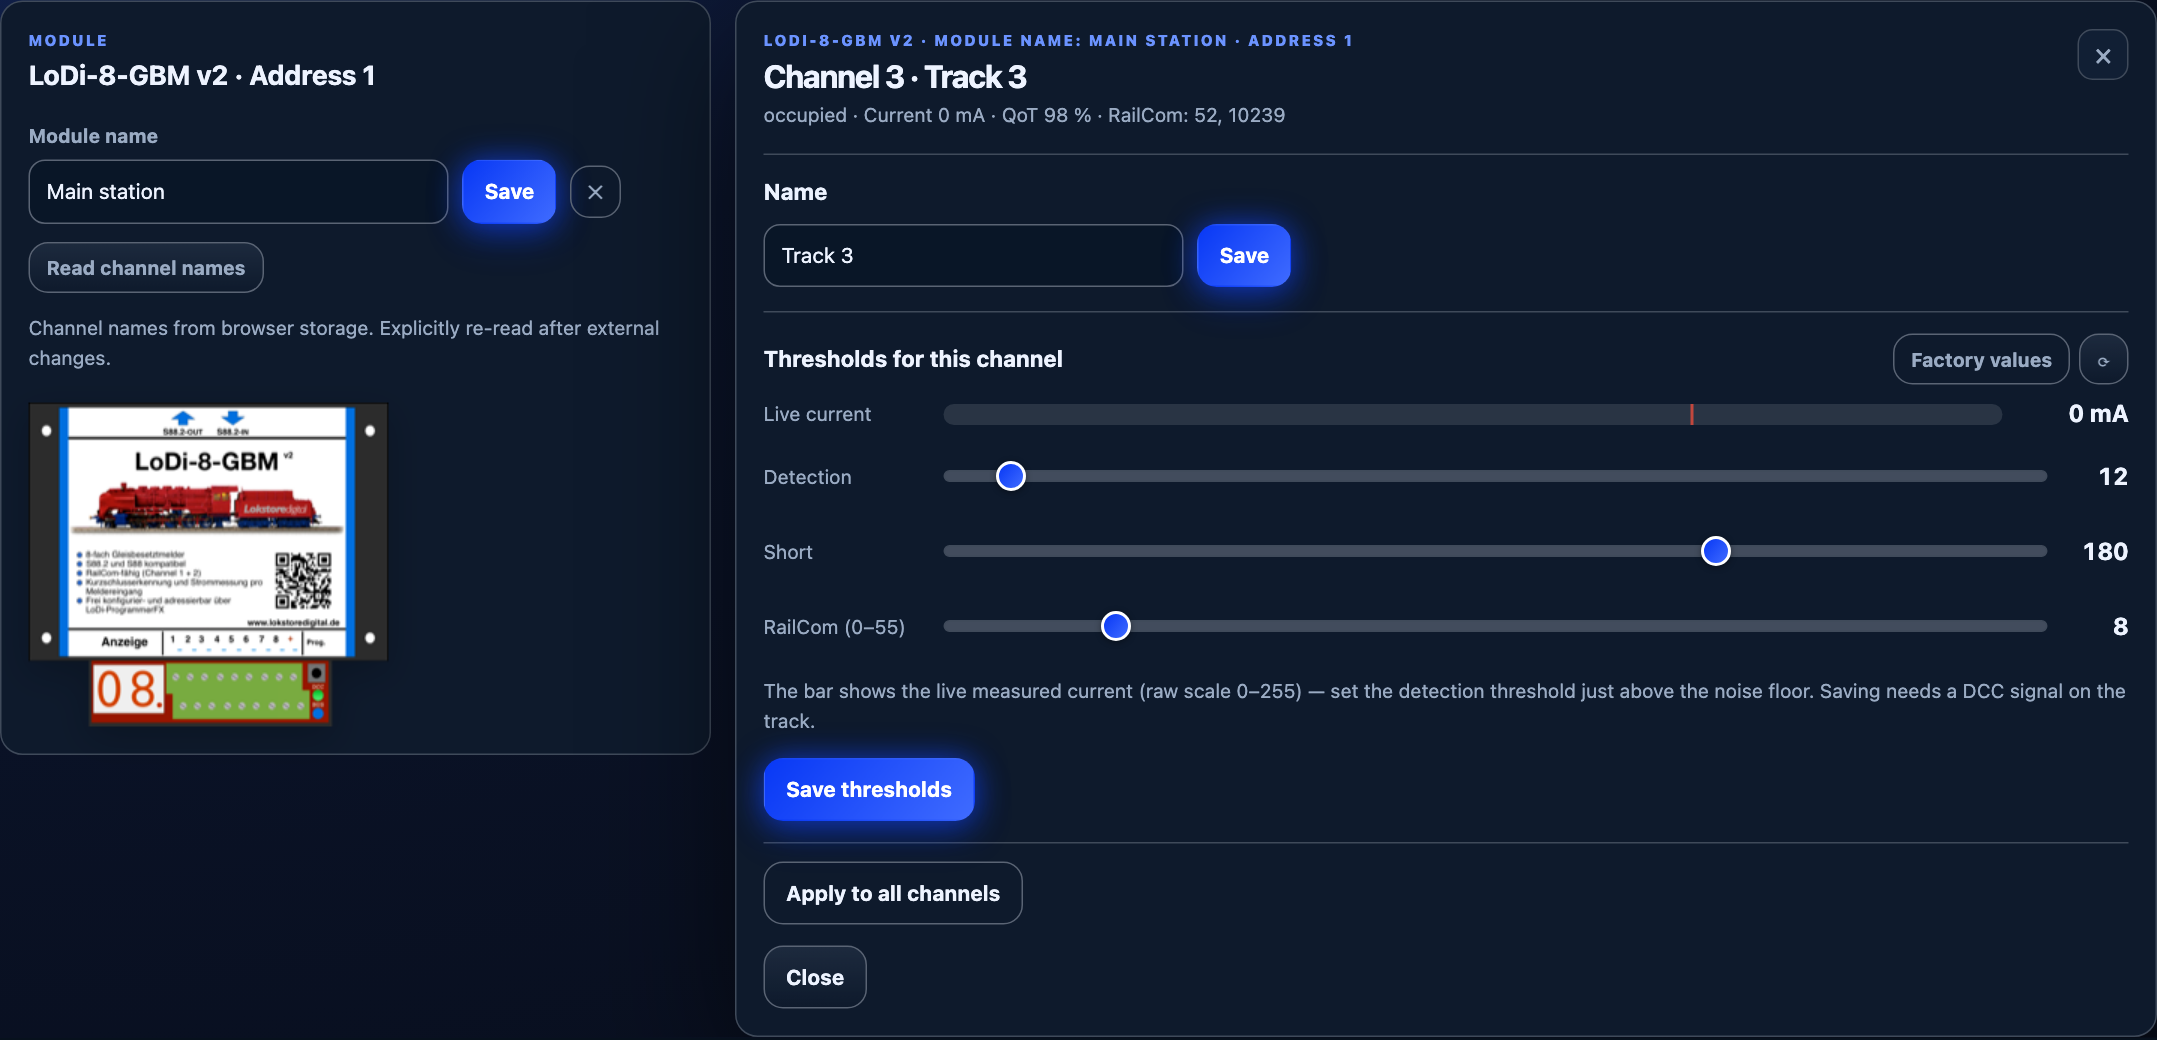
With supported GBM modules, current, track quality and RailCom information are available in addition to the occupancy state. The sliders for detection, short circuit and RailCom are right at the channel. You can save a change for this input only or deliberately apply the thresholds to all channels of this module.
For example: checking a single input – Select the channel concerned, read its existing values and compare the behaviour with the track free and occupied. If an adjustment is needed, it stays limited to this channel. The other inputs do not need to be set again. A confusing search becomes a clear routine: look, adjust, check.
The available values and settings depend on the connected module type. Saving GBM channel thresholds requires a DCC signal on the track. The requirements and steps are in the guide.
Your layout's settings in one place
Under System you reach the bus configuration, network, diagnostics and updates. Bus lengths and delays can be set separately; the network setup guides you through LAN, Wi-Fi or LAN with Wi-Fi as a fallback. Language and appearance are there too.
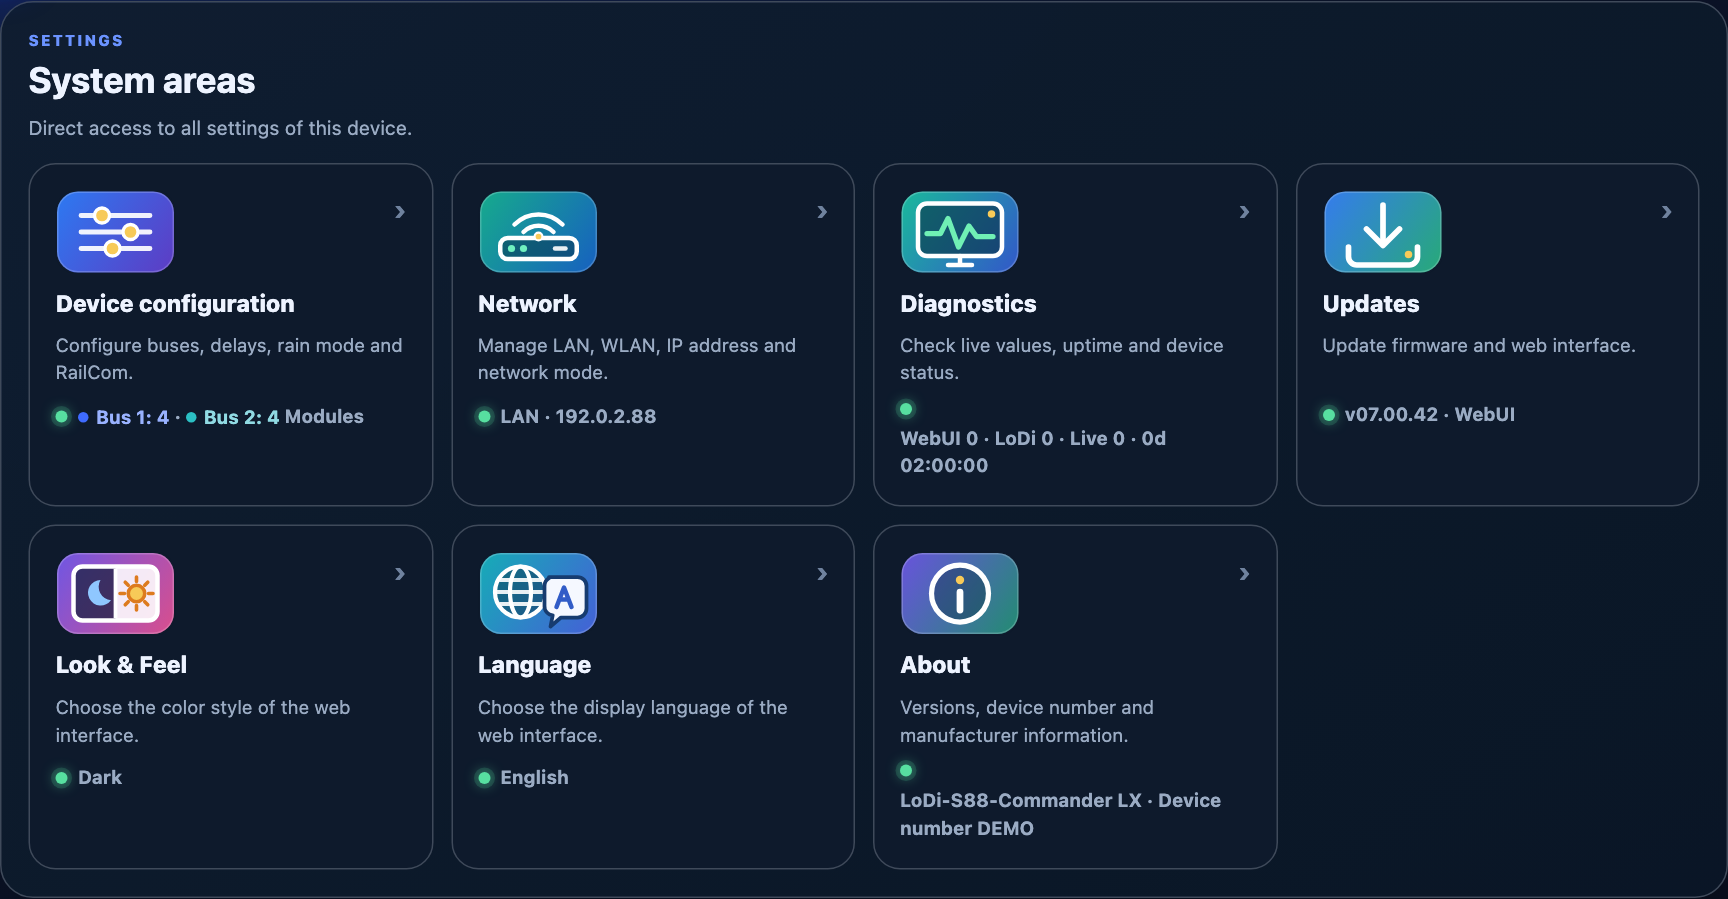
The interface adapts to the screen width. On the layout computer there is room for overview and details side by side. On a smaller screen the sections are arranged one below the other. If you work at the layout with a tablet or notebook, all you need is a network connection to the Commander and a browser.
Updates, even if only your computer has internet
Many model railways have their own network: the computer is connected to the layout via LAN and reaches the internet via Wi-Fi. The Commander itself stays in the closed railway network. This is exactly where the browser can take over the download. It fetches the firmware from the internet and then transfers it locally to the Commander. The Commander does not need internet access for this route.
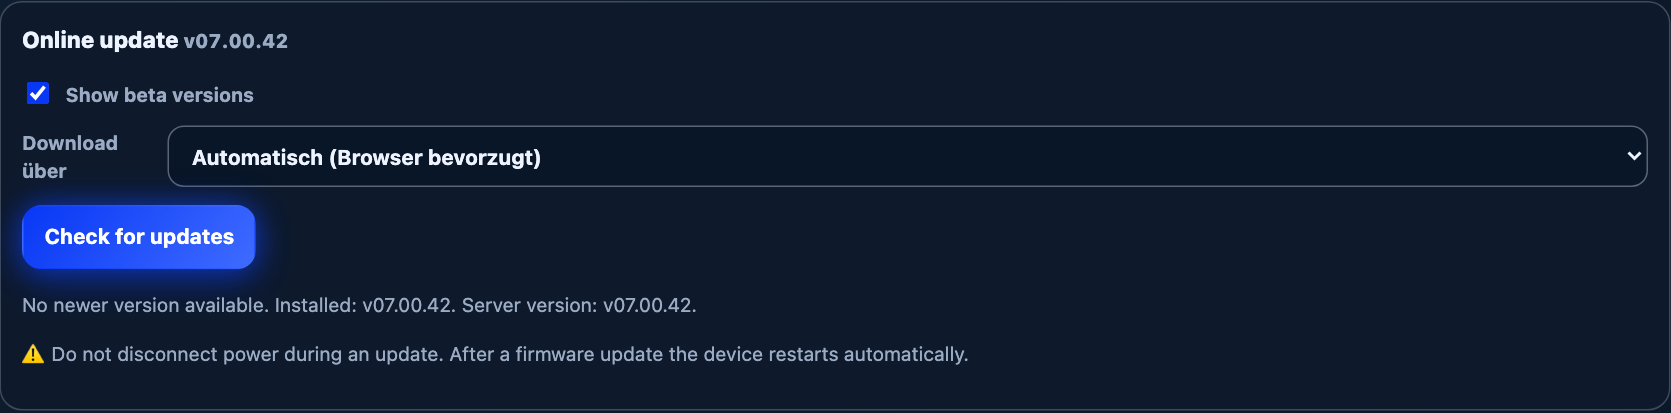
If the Commander has internet access itself, the direct download remains an alternative. Firmware and WebUI are updated together – the interface does not have to be installed as a second package. The display accompanies the transfer and the subsequent restart.
Updating several LoDi modules – downloading the file only once
Firmware updates for supported LoDi feedback modules are also built into the bus view – for example for the LoDi-8-GBM v2, LoDi-8-GBM-P v2 and LoDi-RM-16+ v2. Modules from other manufacturers and conventional s88/s88N modules (Generic) cannot be updated this way. The update dialog distinguishes which version is installed on the module, stored in the Commander and available online. So before you start, you can see which file will be used.
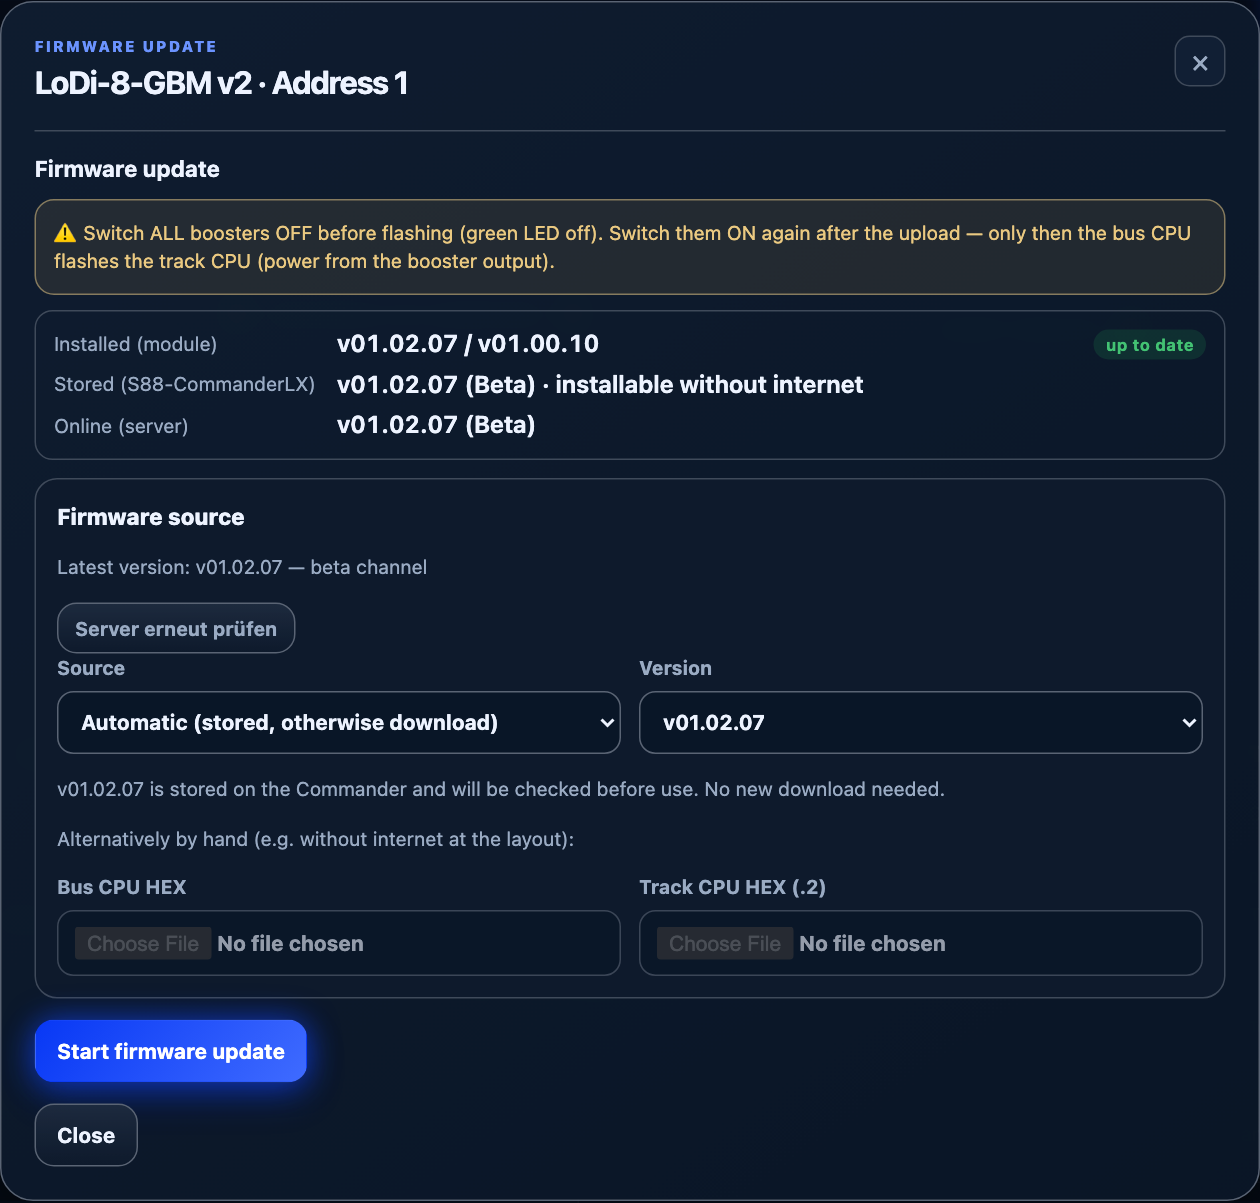
For example: updating several LoDi-8-GBM v2 one after another – For the first module, the required firmware package is downloaded and stored in the Commander. If you then select another matching LoDi module with the same target version, the WebUI can reuse the verified package. You do not have to download again or switch the source each time. You still confirm each target module individually.
A package is only reused if it matches the module family, version and update channel. V1 modules do not become eligible for updates this way. For GBM updates the specified booster sequence still applies: switch off before flashing, switch on again after the complete upload and wait for completion. All details are shown directly in the interface and in the guide.
When something is wrong: more than a photo of the error
A connection drops or a module behaves differently than expected. To narrow it down, it helps to know not only the error message but also the device state at the time. Diagnostics summarises firmware, network, uptime, connections and bus activity, among other things.
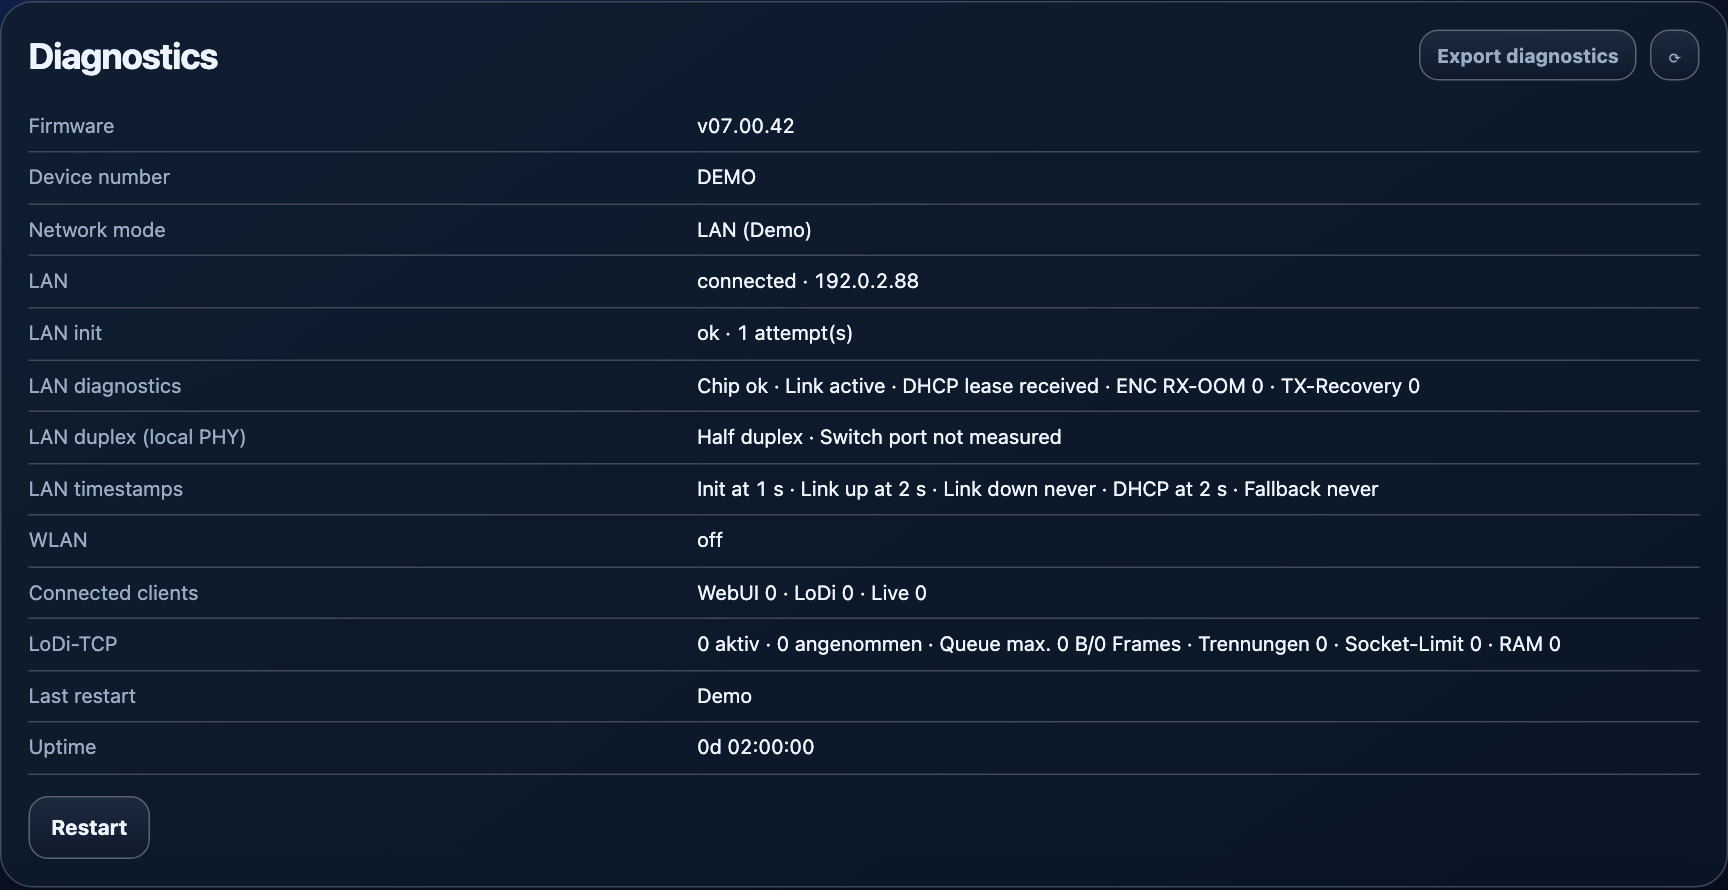
With Export diagnostics you can save this information including log data as a file and pass it on to support. Nothing is sent automatically. If possible, export before a restart and note the time and the situation you observed. That makes a problem much easier to discuss than "it just stopped working for a moment". The export is a diagnostic aid, not a backup of your settings.
Get to know the WebUI and get started
The new interface is a further development for the LoDi-S88-Commander LX. It makes feedback and settings accessible without taking over the job of your model railway control software. The detailed WebUI guide shows how to access it for the first time and then takes you through every area with pictures.
From 6.x to 7.x: AURA or ProgrammerFX first – If your LoDi-S88-Commander LX still runs firmware 6.x, the first upgrade to 7.x is done with AURA or the previous LoDi-ProgrammerFX. Afterwards you open the new WebUI in the browser; further Commander updates are then possible under System → Updates. Update only while the layout is stopped and check settings and feedback afterwards. Returning to 6.x is not possible through the update paths described.